


2. New graphical icons at the top of the GUI to Apply/Cancel/Pg Down/Pg Up which allow you to step backwards & forwards through the current operation.
3. New Brush selection by open and close polyline. To activate, hold the left mouse button (M1) and drag during the polyline definition to enter into the “brush” selection mode.
4. Improvements to the Enhanced pick provides the ability to capture relevant points on virtual intersections, moves snap point along a virtual line (parallel to axes, perpendicular to segments, tangent to circles, etc ).
GUI improvements
5. Hidden line removal and Hidden lines in different style modes have been enhanced and can be used completely during all modelling operations. Options are available in the Settings command for the colour, transparency and style of the hidden lines. New Antialias management improve the graphics representation to avoid the segmentation of lines.
6. The ability to highlight a relevant point and type an exact offset. When the cursor is on a relevant point, it is possible to simply enter the values for the offset or distance point when moving along a relevant direction.
7. Contextual icons on the M2 list - Pressing the right mouse button (M2) or the mouse wheel when inside the command will display the relevant icons typically available in the left-hand icon bar, at the position of the mouse cursor. This simplifies access to the picking options and minimises the cursor movement.
8. Mouse buttons configurations can be adjusted to configure the most commonly used graphics movements to specific mouse buttons and actions.
9. Double click with mouse buttons can be customized using the System/Right Hand Menu command (Double click tab).
10. Speed enhancements when saving files on a network drive. All files are first saved locally (in the tmp folder), from when it is possible to continue to work with the WKF. After this operation, a second thread is started to copy the file onto the network in the background.

VISI 2016 R1 - User Interface
1. Quick Access Toolbar management available on the top bar - A new quick access toolbar is available above the top bar providing access to the standard/system functionalities. Updated icon sets relative to product categories are also available.
2. New graphical icons at the top of the GUI to Apply/Cancel/Pg Down/Pg Up which allow you to step backwards & forwards through the current operation.
3. New Brush selection by open and close polyline. To activate, hold the left mouse button (M1) and drag during the polyline definition to enter into the “brush” selection mode.
4. Improvements to the Enhanced pick provides the ability to capture relevant points on virtual intersections, moves snap point along a virtual line (parallel to axes, perpendicular to segments, tangent to circles, etc ).
GUI improvements
5. Hidden line removal and Hidden lines in different style modes have been enhanced and can be used completely during all modelling operations. Options are available in the Settings command for the colour, transparency and style of the hidden lines. New Antialias management improve the graphics representation to avoid the segmentation of lines.
6. The ability to highlight a relevant point and type an exact offset. When the cursor is on a relevant point, it is possible to simply enter the values for the offset or distance point when moving along a relevant direction.
7. Contextual icons on the M2 list - Pressing the right mouse button (M2) or the mouse wheel when inside the command will display the relevant icons typically available in the left-hand icon bar, at the position of the mouse cursor. This simplifies access to the picking options and minimises the cursor movement.
8. Mouse buttons configurations can be adjusted to configure the most commonly used graphics movements to specific mouse buttons and actions.
9. Double click with mouse buttons can be customized using the System/Right Hand Menu command (Double click tab).
10. Speed enhancements when saving files on a network drive. All files are first saved locally (in the tmp folder), from when it is possible to continue to work with the WKF. After this operation, a second thread is started to copy the file onto the network in the background.

VISI 2016R1 - Update Settings
An enhanced migration tool is available to automatically update Settings/Configurations from a previous version of VISI. This tool allows the update of all relevant configuration files, profiles, custom settings and libraries, databases, CAM settings (tool databases, machine tool configuration, compass configurations), Mould/Progress libraries and others (please refer to the on line help of this tool for a complete description). This tool can be executed at the end of the installation or by running the shortcut installed under the VISI 2016 R1 application within the START menu.

VISI 2016R1 - Network Save
Improved speed when saving files across the network. The system will initially save a local file (from which you are notified when complete, and can continue to work) before saving the file to the desired network location in the background.

VISI 2016 R1 - Drafting Enhancements
1. New Edit element command for the modification of wireframe entities. Double click on the wireframe entity to enter Edit mode. This can be used on segments, circles, arcs, curves, profiles, and polylines. This command allows the modification of shape, position and dimensions.
2. Sketch circles and Sketch lines enhancements - These commands have been improved using the new enhanced pick concept where the potential results are graphically displayed, and can be selected by using the Space bar. Combined selection between Elements and Points has been integrated in these commands.
3. New option to create a Segment/line tangent to two curves within the Sketch command.

VISI 2016 R1 - Plotview
1. Enhancement on the Plotview Manager - Views, sections and details (and relative hierarchy) are now shown in the tree of the Plotview manager Pages
2. View information is now displayed in the properties zone relevant to the selected node in the tree. For example, if selecting the page node, only the relevant information of the page is displayed, while if selecting a view, only the relevant information of the view is presented.
3. New Outbreak section in Plotview - The ability to create a portion of a section inside a View (to create a combined view/section). It is also possible to determine the outer boundary format and the depth value for the section.
Other Plotview enhancements include :
Improvements on the arrows position for partial sections
An option to show only the layers or the parts used for view creation within the view properties dialogue
An option to select the parts in 3D environment within the view properties dialogue

VISI 2016 R1 - Standard Element Enhancements
Elements Configuration - An updated tool to edit 3D component libraries provides additional capabilities for easy catalogue selection, easy editing of element properties and better element and Rule table editing. There are also new options when inserting standard components to “Remember Settings” which allows the user to define all parameters within the insertion mask, and recall for a different scenario.

VISI 2016 R1 - Mould Cooling Enhancements
CAD transformation commands are now automatically notified and managed within the Cooling system. When selecting a cooling channel during a translation operation, the system automatically selects all of the relevant the cooling parts (solid, 2D and standard elements). After the CAD transformation (including copy), the system will automatically update the relative cooling structure within the cooling toolbox.
Cooling
Secondly, it is now possible to manage Cooling channels within Solid Groups. Importantly, it is also possible to manage a solid with subtracted Cooling channels as an instance. In this case, When copying or transforming the instance, the relative Cooling data will be managed and updated accordingly. It is also now possible to add a standard element directly during the cooling channel sketching process.
1. The cooling/standard elements interface has been reviewed providing better management during the standard elements definition.
2. It is now possible to insert standard elements using the multiple selection within the cooling toolbox.
3. Within the cooling toolbox tree structure, the icon status will change in the event of the segment or solid losing the linking with the 3D plate.

VISI 2016 R1 - Lubrication Grooves
A new Lubrication Groove command has been developed for 2016 R1. This command allows to creation of lubrication grooves on the selected face of the plate using a builders that provides the user with a number of shapes & customization parameters.

VISI 2016 R1 - Progress strip study
Parts Replacement using Instances management - This improvement applies any modification to the original master part geometry to be automatically added to the 3D strip without any rebuild, significantly saving time during the process. This new methodology provides an automatic associativity between the reference parts and the strip design. It is also possible to define Punches in the Strip using the instances management. This means that punches can now be managed as instances within the project (including the ability to extrude punches). Therefore any modification to the parent geometry will be replicated on all instances.
Multiple strip analysis - Using 2016 R1 it is now possible to review multiple strip parameter configurations as a separate 3D strip design. This is particularly useful during the estimating phase, where the user may work on more than one strip project to evaluate the best solution.
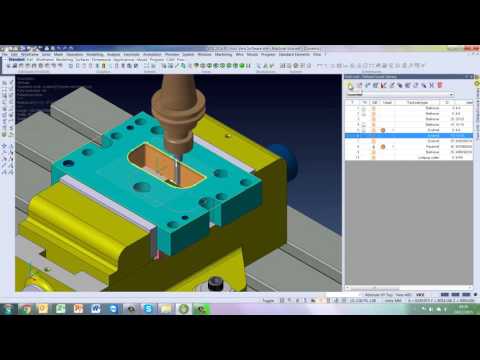
VISI 2016 R1 - Contouring after zig zag roughing passes
VISI 2016 R1 introduces new functionality to create the contouring step at the end of a zig-zag roughing pass. In previous versions, this was only available before the zig-zag roughing pass. When the zig-zag roughing is executed before the contouring step, a ramp approach is required and automatically created. Please note that the ramp approach follows a backward path along the zigzag path, to reach the Z level to start the roughing pass.

VISI 2016 R1 - Snapshot Manager
Improvements to the Snapshot manager include the ability to force a white background for image production, and the ability to work in Plotview mode and copy the snapshot to the clipboard ready to paste in other documents. It is now possible to save the snapshot list as separate image files (Bmp, Jpg, Png, Tif).